This post is sponsored by Cricut.
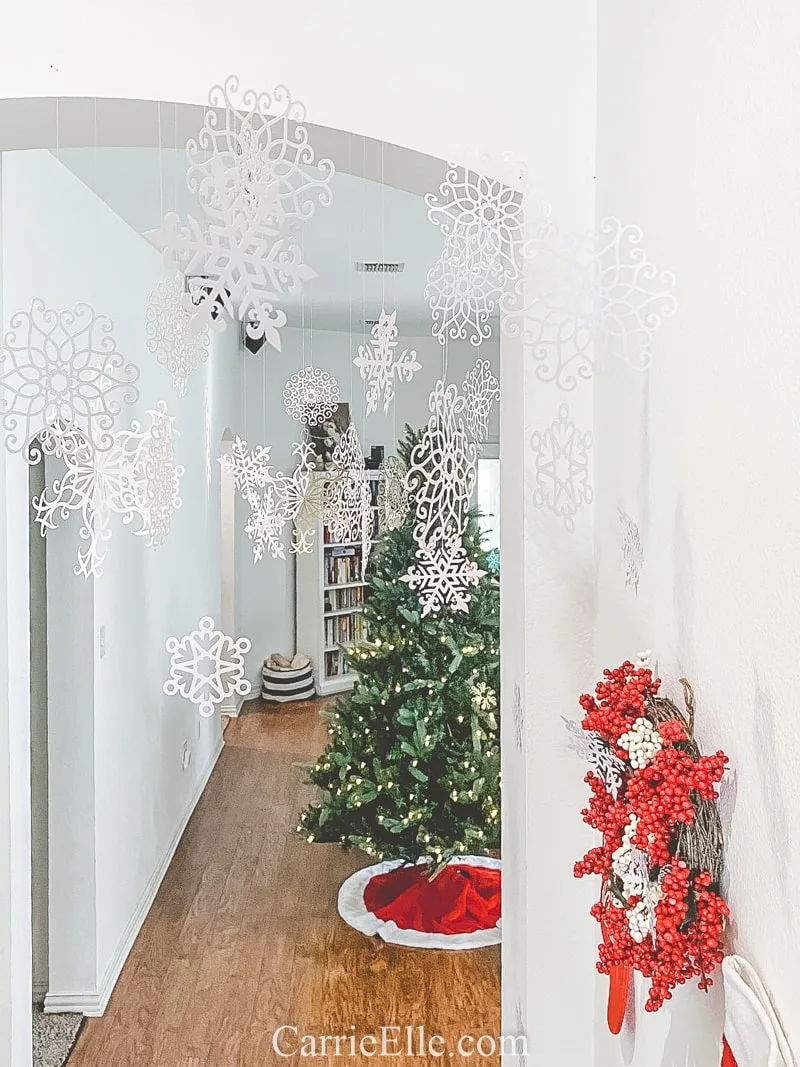
I have been having so much fun with my Cricut these last few months (did you see the pumpkin wall I made back in October?). For months now, I’ve been planning out my Christmas crafts. The first one to come to life is this paper snowflake winter wonderland. It’s one of the first things you see when you walk into my house and it’s added a magical touch to an otherwise boring space.

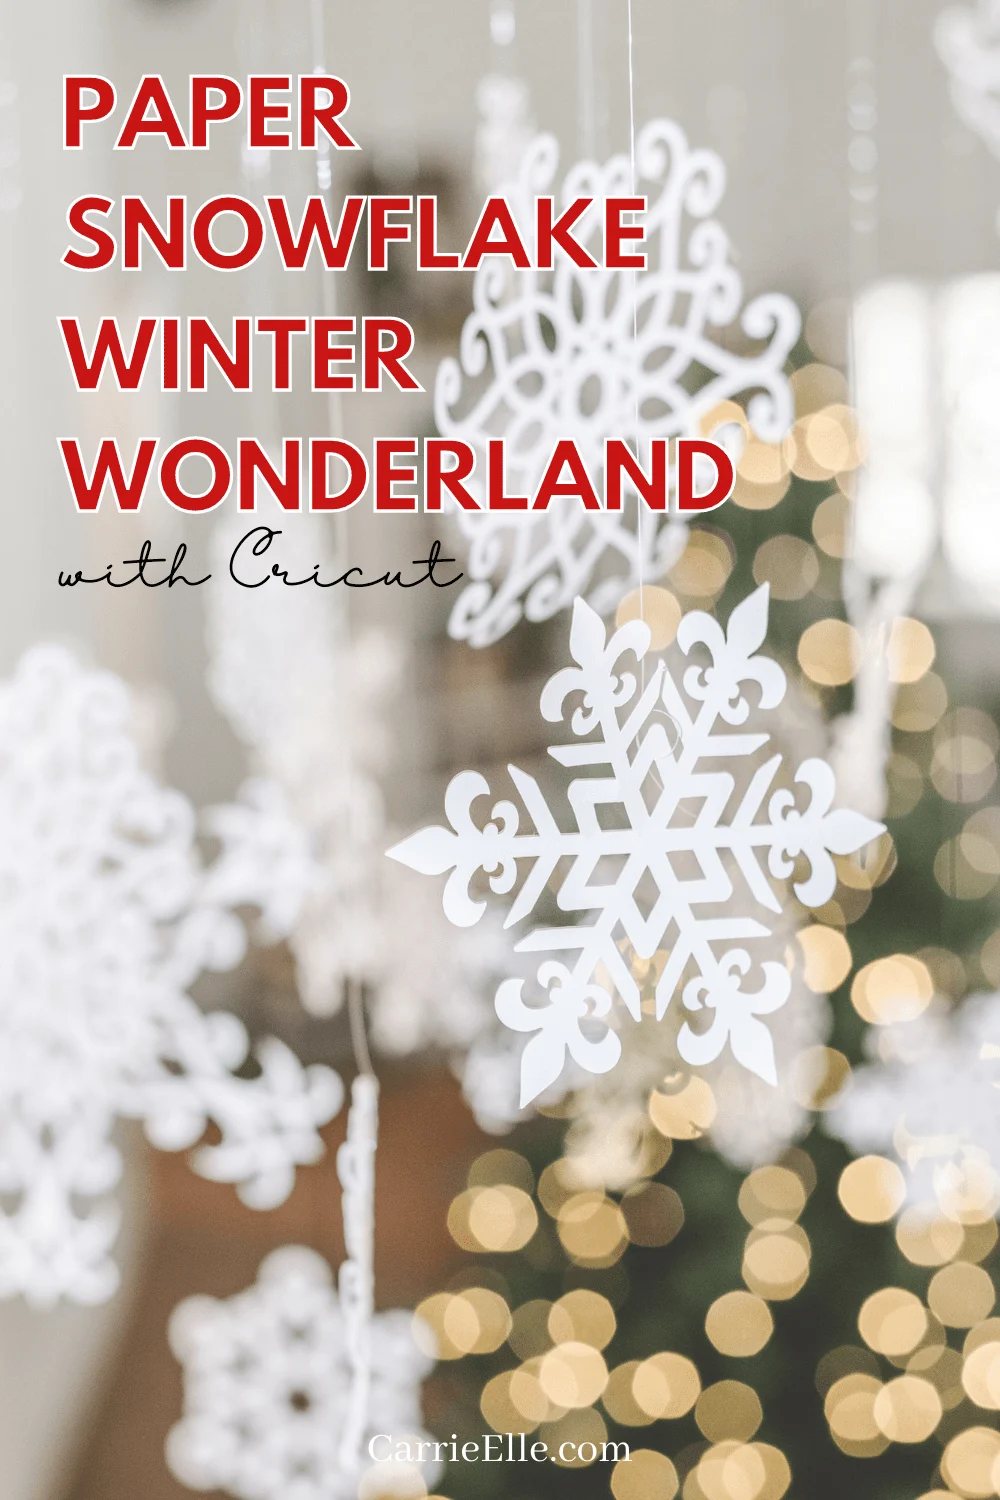
Paper Snowflake Craft with Cricut
Something you should know about me (if you don’t already) is that I love rainbows. I always have. I always will. And sometimes, when I try to do something non-rainbow, the rainbow just sort of…spills out of me. That was the case with this Cricut craft. My plan was to create a white, silver, and gold snowflake entryway. But then…colors just started to show up in Christmas decor I was choosing to put out with the snowflakes, and so I decided to make a few colorful snowflakes to go with it, and well…one thing led to another. So I kind of have two projects to share with you today – the original one, and the rainbow-y version.
These snowflakes are perfect for an entryway, a child’s room, a window, or basically anywhere in the entire house because they are gorgeous! This is also a great beginner craft if you’re new to the Cricut.


Here’s what I used to make these paper snowflakes with Cricut:

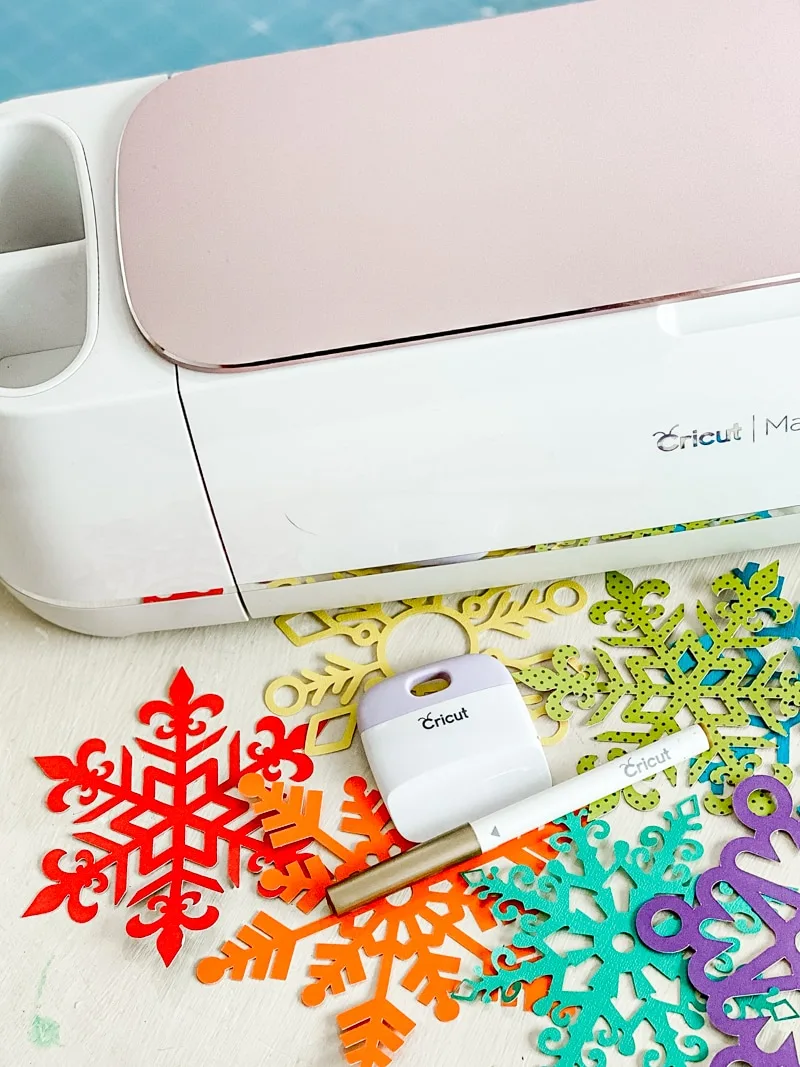
Cricut Maker – If you don’t have one yet, what are you waiting for? Seriously, there is so much you can do with this amazing machine.
White Cricut Cardstock – You don’t want to use any lighter paper for these because they are already super delicate as it is. They get tangled up and tear easily, so sturdy paper is important.
Multi Pen Set, Gold – This particular set is designed to be used by the machine, but I used it myself (by hand) to add some gold to some of the snowflakes.
Acetate – I used this to create a few snowflakes, just to change it up a little!
Poster Board Metallics – This will also add some variety to your paper snowflakes.
I hung my snowflakes with fishing wire and wall-safe tape.
Want to make rainbow snowflakes? Here is the paper I used for my rainbow version:
Cardstock Jewels – These pretty colors work with any project, year-round.
Deluxe Paper, Juneberry – I pulled a couple holiday-friendly pages out of this paper pack, too.


How to Make Paper Snowflakes with Cricut
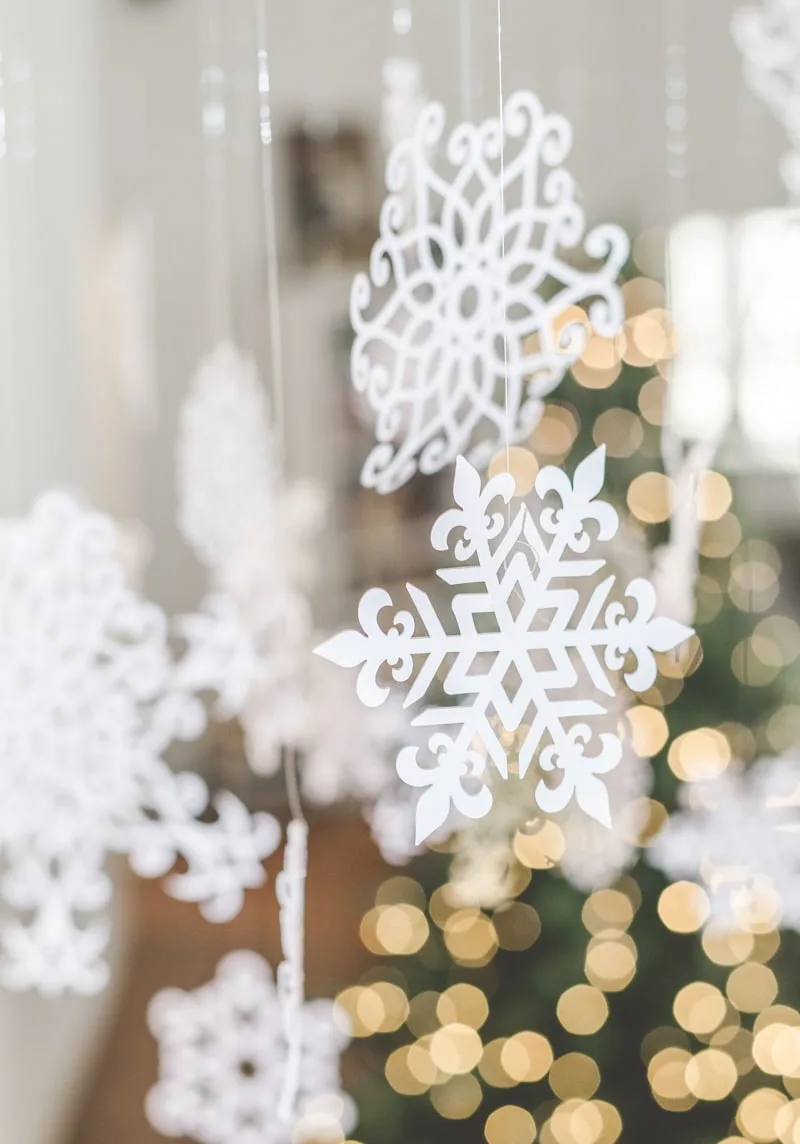
You can pick out your favorite snowflakes in the Cricut Design Center. If you are planning on hanging your snowflakes, you’ll need to make sure they have a place to tie your wire through – so look for snowflake patterns with holes! I used some very intricate snowflake clipart for some of my snowflakes, but as I got going I realized they were a lot easier to hang and less likely to bend if I went with the thicker designs.
I made my snowflakes in a variety of sizes. Most of the ones you see here are about 4.5″ x 4.5″. However, some are closer to 8″ x 8″, and everything in between. Changing the size and shape adds depth and makes the display more fun.
You can play with different sizes as you set up your design in the Cricut Design Center.

I don’t have a set formula for how many snowflakes you’ll need to make. Just take a guess, and then make about 30% more. Trust me, the more the merrier!
Once you have all your snowflakes cut, you can use fishing wire to hang them. The length of the wire will depend on how high your ceiling is, and how high you want each paper snowflake to be. I recommend changing it up a little and staggering the height. Tie a piece of wire loosely to a “hole” in each snowflake.
PRO TIP: These things are super tangly, and once you add the wire, it’s even worse. Keep them separated to reduce breakage as you’re pulling them apart!
You can hang quickly and easily using wall-safe tape.

How to Store Your Paper Snowflakes
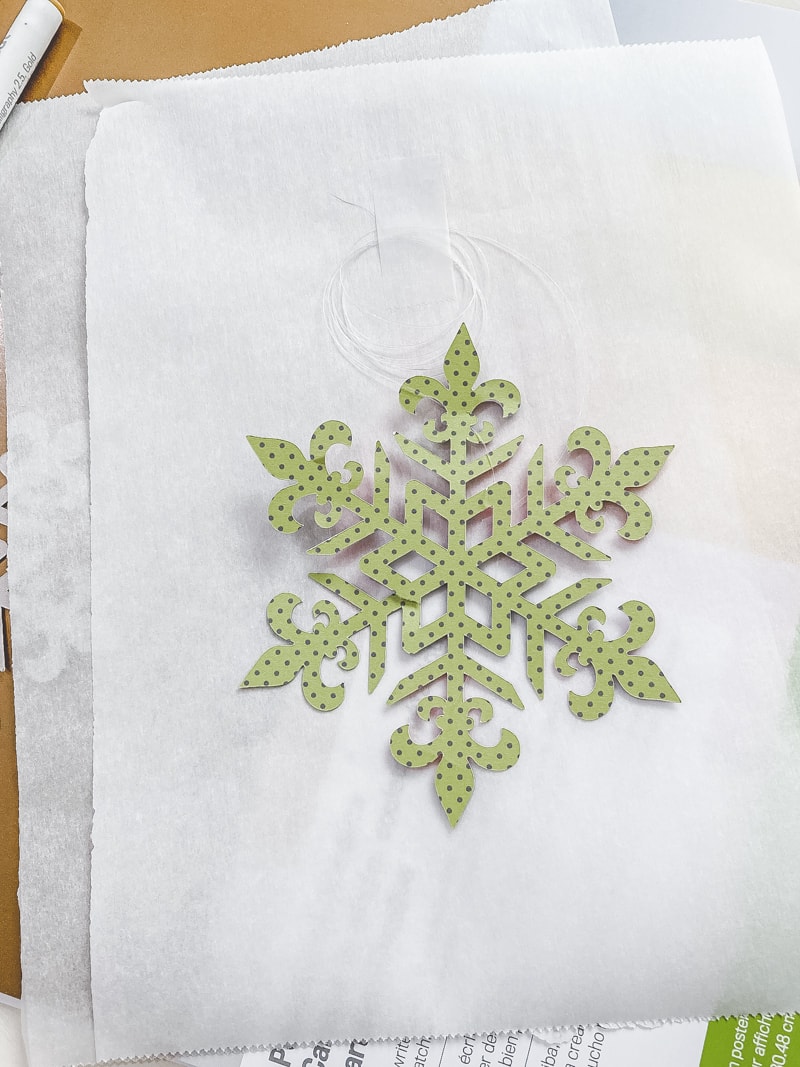
Like I mentioned earlier, these things are SO tangly. They’re also pretty, and took a lot of cutting, and you’re definitely going to want to use them again! You really want to keep them separated. Before you take them down, cut out a piece of parchment for each paper snowflake (see the picture below). Grab a piece of parchment. Wrap up the fishing line in a loop and tape it to the parchment. Lay the next piece of parchment down on top of it for the next snowflake. This will keep the wire from getting tangled and also keep the snowflakes from getting tangled!
Next year, you can just pull them out one by one to hang again. You’ll be so glad you took the time to do this step!

I hope you get as much joy out of these paper snowflakes as I have! They have been so much fun to make, display, and enjoy. Happy Holidays!